

If your vape tastes off, draws weak, or simply looks grubby, learning how to clean a vape properly is the quickest fix, and it takes only a few minutes. A clean device delivers better flavor, smoother airflow, and a more hygienic puff every time. This guide walks you through cleaning every part of your kit, from the tank and coil to pods, mouthpieces, and prefilled devices, with simple steps based on hands-on experience across the pod kits, mods, and disposable vapes.
Explore Our Categories

Why Cleaning Your Vape Matters
A vape goes straight into your mouth several times a day, so a regular clean is worth the small effort. Dust, pocket lint, and e-liquid residue accumulate around the mouthpiece, tank threads, and airflow holes over time. That build-up affects you in four clear ways.
First, it dulls the flavor because old residue mixes with fresh e-liquid. Second, it restricts airflow, making the draw feel tight or weak. Third, it is simply more hygienic to wipe down a part that comes into contact with your lips daily. Fourth, regular maintenance helps your device last longer, since gunk around the battery connection can cause charging and firing faults. A few minutes of care protects both your experience and your investment, which is why learning how to clean a vape is a habit worth building.
How Often Should You Clean Your Vape?
The amount of vaping you do determines how often you clean. Heavier daily use means more frequent attention. Use this simple schedule as a guide.
| Task | How Often |
|---|---|
| Wipe the mouthpiece and exterior | Daily |
| Quick tank or pod rinse | Weekly, or at every refill |
| Deep clean the tank and components | Every coil change (roughly every 1 to 2 weeks) |
| Clean the 510 connection and battery contacts | Monthly, or whenever performance drops |
| Clean up after any leak or spill | Straight away |
Sticking to a light daily wipe saves you from needing a heavy deep clean later on.
What You'll Need to Clean a Vape
Before you begin, gather a few essentials. Most are already in your bathroom or kitchen.
- Warm water
- Paper towel or a clean microfiber cloth
- Cotton buds or cotton swabs
- A little mild dish soap
- Isopropyl (rubbing) alcohol, 70 percent or higher
- A small soft brush (optional, for stubborn residue)
One important rule applies throughout: never submerge the battery or any electronic part in water, and always check your device manual first, since some kits have specific care instructions.
A Step-by-Step Guide to Cleaning Each Part of a Vape
Below is a component-by-component breakdown. Find the parts that match your device and follow those steps. Always switch the device off and let it cool fully before you begin. The full process of how to clean a vape is far easier when you tackle one part at a time.
Cleaning the Vape Tank
The tank holds your e-liquid and gets the dirtiest, so it benefits from regular attention. The best time for a thorough clean is when you change the coil.
- Empty any remaining e-liquid, then unscrew the tank into its separate parts: drip tip, glass section, base, and coil. Keep track of the small rubber O-rings.
- Rinse each part (not the coil) under warm running water to flush away residue.
- For a deeper clean, soak the parts in warm water with a drop of mild dish soap, then rinse thoroughly so no soap taste remains.
- To remove a strong flavor before switching e-liquids, soak the glass and base in warm water. Only if a stubborn taste remains, use a brief soak in a little isopropyl alcohol as a last resort, keeping it to the glass and base, then rinse thoroughly with warm water afterward.
- Dry every part completely with a paper towel, reassemble, and refill.
Cleaning the tank at each flavor change keeps your next e-liquid tasting true.
Cleaning the Vape Coil
It is worth being honest here. Standard replaceable vape coils, the kind most vapers use, are not designed to be cleaned and are inexpensive to swap out. A quick rinse under warm water and a full air-dry can buy a little extra life, but soaking a used coil tends to damage the wicking and rarely restores flavor. If your vape tastes burnt, the coil almost always needs replacing rather than cleaning.
Rebuildable coils are different. If you build your own, you can dry-burn the coil gently, brush away the residue with a coil tool until it glows evenly, then re-wick with fresh cotton. For everyone else, a fresh coil is the simpler and more reliable choice.
Cleaning the Vape Pod
The method depends on your pod type. Pods with a built-in coil cannot be fully rinsed, because water inside will spoil the e-liquid and the coil. For these, simply wipe the pod with a cloth, clean the mouthpiece, and keep the contact points dry. This applies to most pod-style and rechargeable disposable vapes.
Pods with a replaceable coil can be cleaned more thoroughly. Knowing how to clean vape pod parts correctly means working over a sink: remove the coil, rinse the empty pod under warm water, dry it with a paper towel, and flick out any trapped droplets before fitting a fresh coil. Make sure the pod is completely dry, as leftover water can thin your e-liquid.
Cleaning the Mouthpiece and Drip Tip
The mouthpiece touches your lips, so it picks up the most dirt and debris. If it is removable, take it off and rinse it under a warm tap, paying attention to any grooves where residue collects. A soak in warm, soapy water handles a heavier build-up; just rinse and dry it fully before refitting. If the mouthpiece is fixed in place, wipe the inside and outside with a cotton bud, and gently blow through it to clear any blockage.
Cleaning a Vape Pen
A vape pen combines a battery body with a tank or pod, so cleaning one means caring for both. The steps for how to clean a vape pen begin with the tank or pod, using the methods above. Next, wipe the battery body with a slightly damp cloth or a cotton bud lightly dampened with isopropyl alcohol. If the airflow feels blocked, clear the airflow holes and mouthpiece with a dry cotton bud until the draw opens up again, and never run the battery section under water. The same cleaning routine applies to both slim pen kits and larger pen-style devices.
Cleaning the 510 Connection and Battery Contacts
The 510 connection is the threaded point where your tank screws onto the battery. E-liquid and dust can collect here, interrupting firing or charging. Take a dry cotton bud and gently clear any residue from inside the connection and around the contact pin. While you are there, clean the charging port with a dry cotton bud or a quick puff of air, as dust in the port can disrupt charging. Keep this area dry at all times.
Cleaning a Vape Cartridge
Refillable cartridges can be emptied, rinsed under warm water, dried fully, and refilled, much like a pod. Prefilled cartridges are sealed units not intended to be opened, so limit care to wiping the outside and clearing the mouthpiece.
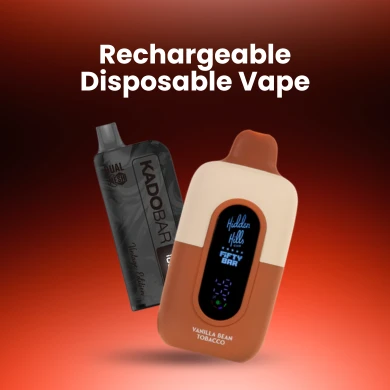
How to Clean a Disposable or Prefilled Vape
Today's prefilled and rechargeable devices last far longer than the old single-use bars, so a little upkeep goes a long way. You cannot open most sealed units, and you should not try, since opening a disposable vape is not part of safe maintenance. Instead, focus on surface care across the disposable vapes you own.
Knowing how to clean a disposable vape is mostly about hygiene and airflow. Wipe the exterior with a cloth to lift hand oils and any leaked e-liquid, then sanitize the mouthpiece with a cotton bud, especially before sharing. To keep the draw smooth, gently clear the small air holes at the base with a dry cotton bud. This surface-only routine for cleaning disposable vape models works for every prefilled brand we stock, and a quick weekly wipe is the simplest way to keep them fresh until the final puff. If a device becomes hard to draw from even after cleaning, it has likely reached the end of its life. The same gentle care applies to cleaning older sealed-style e-cigarette devices, since a careful wipe is all that is safely possible.
Vape Cleaning Mistakes to Avoid
A few simple errors can damage a device or create a safety risk. Keep these rules in mind.
- Never submerge the battery, mod, or any electronic part in water.
- Do not clean a device while it is still warm; let it cool fully first.
- Avoid harsh or abrasive chemicals, which can scratch finishes and damage seals.
- Do not reuse or replace a replaceable coil that has been soaked in soapy water.
- Dry every part thoroughly before reassembly, as trapped moisture can cause leaks and poor performance.
Troubleshooting: When Cleaning Is Not Enough
Sometimes a cleaning will not fix the problem, and a part simply needs to be replaced. Use these signs to diagnose your device.
| Symptom | What to Do |
|---|---|
| Burnt taste | The coil is worn out and should be replaced, not cleaned. |
| Weak or airy draw | Clean the airflow holes and mouthpiece; if it persists, check the coil seating. |
| Gurgling sound | The coil is flooded, often from overfilling; remove excess liquid and let it settle. |
| Leaking | Inspect the O-rings and make sure every part is screwed together snugly. |
| Device will not fire | Clean the 510 connection and battery contacts, then recheck. |
Frequently Asked Questions
What Is the Best Way to Clean a Vape?
Disassemble the device, rinse the tank or pod parts under warm water, wipe the battery body and mouthpiece, and clear the 510 connection with a dry cotton bud. Dry everything fully before reassembling. Following this simple order is the most reliable way to clean a vape at home.
How Often Should I Clean My Vape?
Wipe the mouthpiece and exterior daily, rinse the tank or pod weekly, and perform a deep clean at each coil change, roughly every 1 to 2 weeks.
Can a Vape Coil Be Cleaned and Used Again?
Cleaning is not intended for standard replaceable coils. A rinse may add a bit of life, but a burnt taste means it is time for a fresh coil.
Can I Use Water to Clean My Vape Tank?
Yes. Warm water is ideal for the tank glass and base. Add a drop of mild soap for a deeper clean, then rinse thoroughly so no taste lingers.
Is It Safe to Use Isopropyl Alcohol to Clean a Vape?
Yes, for non-electronic parts such as the tank or mouthpiece, and for wiping the exterior. Keep alcohol away from the battery and rinse the parts afterward.
How Should a Disposable Vape Mouthpiece Be Cleaned?
Wipe it with a dry or lightly dampened cotton bud, reaching into any grooves. Cleaning a vape disposable mouthpiece is especially worthwhile before you share the device with someone else.
How Long Should a Vape Cool Before Cleaning?
Let the device cool completely, usually a few minutes after your last puff, before you start cleaning it.
Final Thoughts
A clean vape simply works better, giving you truer flavor, smoother airflow, and a longer device life. Build a quick daily wipe into your routine, and learn to clean your vape thoroughly at each coil change to keep everything running well. Knowing how to clean your disposable vape keeps even your simplest device fresh between puffs. When you need fresh coils, pods, tanks, or a new kit, explore the full range at Betty Vape and keep your setup in top condition.
Want to know more about rechargeable and disposable vapes? Visit our blog section or contact us at support@bettyvape.com or call (423) 819-6480. Our expert support team is here to help.